Customizing Jetpack
Jetpack remains a polarizing plugin amongst developers so it’s not often discussed on developer-oriented blogs. The plugin has a history filled with bloat, slowness, and conflicts with other plugins. Admittedly, I myself have a love/hate relationship with it. However, recently, it’s been improved so much that I feel comfortable recommending it for some users. It’s now truly modularized, allowing complete control over which features are activated, and much more stable. My biggest pet peeve will always be the way you have to connect to WordPress.com to use it. I understand all the technical reasons for that, but it’s a terrible user experience that is very confusing (especially for novice WordPress users).
With all that said, why is Jetpack making an appearance here? The fact is if you can get past the clunky activation, Jetpack offers a great suite of features for the average blogger. But, in keeping with the WordPress philosophy of “decisions not options”, as an end user, you don’t have many configuration settings compared to all the options you would get if you used a similar standalone plugin.
Fortunately, the code has been sprinkled with actions and filters for developers. So, while Jetpack is generally marketed to entry-level end users, there are actually some nice Easter eggs for developers who want to customize things a little bit for their clients −I call them Easter eggs because the ability to customize Jetpack hasn’t really been highlighted or documented too much. There has yet to be a complete resource that documents all of filters and actions available (I’ll give just a few examples here), but you can dig through the code looking for add_filter and add_action to find more. The code can be found on GitHub for easy reading (and if you want to contribute).
This article assumes you have some experience with development or at least are not afraid to work with code, even if it’s just copy/pasting snippets (hey, we all start out like that!). Here’s just a handful of ways you can tweak Jetpack.
Ditch That WordPress.com Connection…
…Well, almost. You can actually use Jetpack without connecting to WordPress.com, at least partially. Some of the modules will work fine without the connection whereas some will remain unavailable. This comes handy when you are working on a local installation or even a production site if you’re only using certain modules.
Add the following to your wp-config.php file to use development mode:
define( ‘JETPACK_DEV_DEBUG’, true);
Customization Best Practices
When customizing Jetpack, there are a couple of things to keep in mind:
- Your customizations will generally be achieved by writing your own functions, so make sure to use unique function names to avoid collision with any other plugin. I’ll prefix all mine with ‘wtwlb’ (wtw for WebTrainingWheels, lb for my initials) in these examples.
- Customizations can either be done in your theme, the child theme’s functions.php and template files, or via a ‘functionality plugin’. This is a simple plugin that contains anything you would otherwise paste in functions.php and it is advantageous because it’s theme-independent. If you plan on using the Jetpack mobile theme and customizing it, you will need to do it this way.
Customize The Sharing Module
The sharing module in Jetpack is popular as it’s a pain-free way to add the most popular social share buttons to your content. Yet there are a couple of limitations.
Change Button Placement
By default, Jetpack lets you choose on what content (posts, pages, homepage, etc.) you want the buttons to appear, but it automatically places the buttons at the bottom of the content. A common request is to add the buttons at the top as well as (or instead of) at the bottom. This is really easy to do.
The icons are placed using a filter on the WordPress tags for the_content and the _excerpt:
add_filter( ‘the_content’, ‘sharing_display’, 19 );
add_filter( ‘the_excerpt’, ‘sharing_display’, 19 );
Removing either of those placements would be a matter of writing a small function to remove the appropriate filter. To remove it from the_content, and, therefore, from the bottom of the post, for example, the below would work:
function wtwlb_remove_share() {
remove_filter (‘the_content’, ‘sharing_display’, 19 ); }
add_action (‘loop_start’, ‘wtwlb_remove_share’);
Then you can use the following in your functionality plugin to place the buttons at the top of the post:
function wtwlb_move_jpshare( $content = ” ) {
if ( function_exists( ‘sharing_display’ ) ) {
return sharing_display() . $content;
}
else {
return $content;
}
}
add_filter( ‘the_content’, ‘wtwlb_move_jpshare’, 19 );
If you want to manually place the buttons elsewhere in your custom theme or child theme’s template files, you can use the following wherever you want the buttons to appear:
if ( function_exists( ‘sharing_display’ ) ) {
sharing_display( ”, true );
}
Remove the Counter
By default, Jetpack will show the sharing counts on the buttons. If you’d like to prevent that, you can do so with one line:
add_filter( ‘jetpack_sharing_counts’, ‘__return_false’ );

Style The Icons
There’s no fancy trick to styling Jetpack sharing buttons. You can radically change the look with pure CSS in your child theme. The icons themselves are Genericons (an icon font), making them easy to manipulate the color, size, etc.
Customize Related Posts
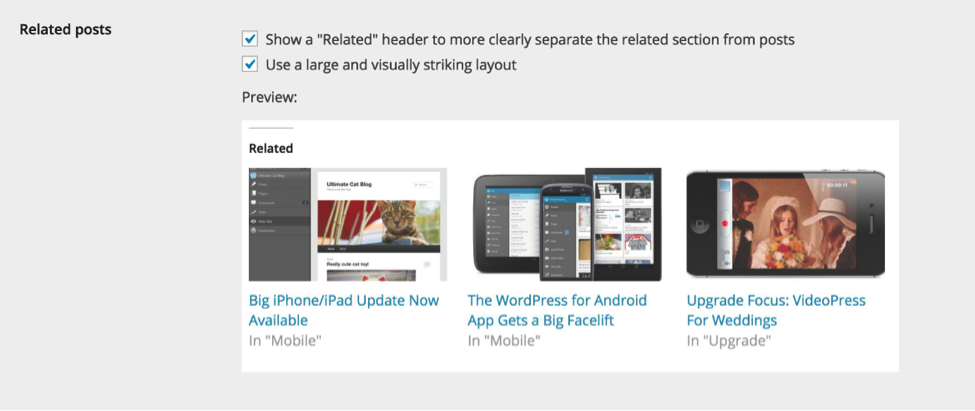
Showing related content is a great feature to keep readers on your site, but some WordPress plugins that do this can be slow and inefficient. Jetpack offloads the intensive processing work to its WordPress.com servers, allowing for a nimble Related Posts feature. By default, you only have two options to customize:
So, here are a few handy tweaks you can make:
Customize the Number of Posts
By default, the module displays three posts. You can change that with the function below. For example, this will set the number of posts to four:
function wtwlb_jpmore_related_posts( $options ) {
$options[‘size’] = 4;
return $options;
}
add_filter( ‘jetpack_relatedposts_filter_options’, ‘wtwlb_jpmore_related_posts’ );
Since I want four posts in a row and the module style is based on three, I’ll need to tweak the CSS to accommodate. Here I set the width of each to 25% instead of 33%:
div#jp-relatedposts div.jp-relatedposts-items .jp-relatedposts-post {
width: 25%;
}
div#jp-relatedposts div.jp-relatedposts-items .jp-relatedposts-post:nth-child(3n+4),
div#jp-relatedposts div.jp-relatedposts-items-visual .jp-relatedposts-post:nth-child(3n+4) {
clear: none;
}
Change the Headline
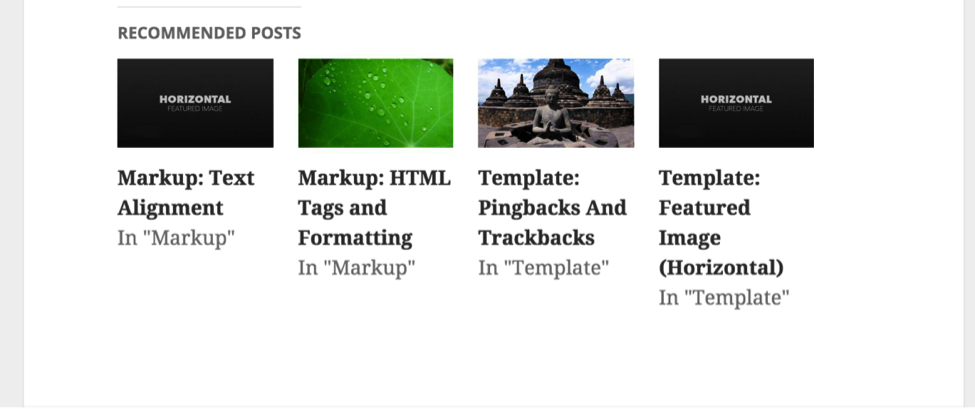
The default headline for the related posts section is simply “Related”. In this snippet, we’ll change that to “Recommended Posts”:
function wtwlb_related_posts_headline( $headline ) {
$headline = sprintf(
‘<h3 class=”jp-relatedposts-headline”><em>%s</em></h3>’,
esc_html( ‘Recommended Posts’ )
);
return $headline;
}
add_filter( ‘jetpack_relatedposts_filter_headline’, ‘wtwlb_related_posts_headline’ );
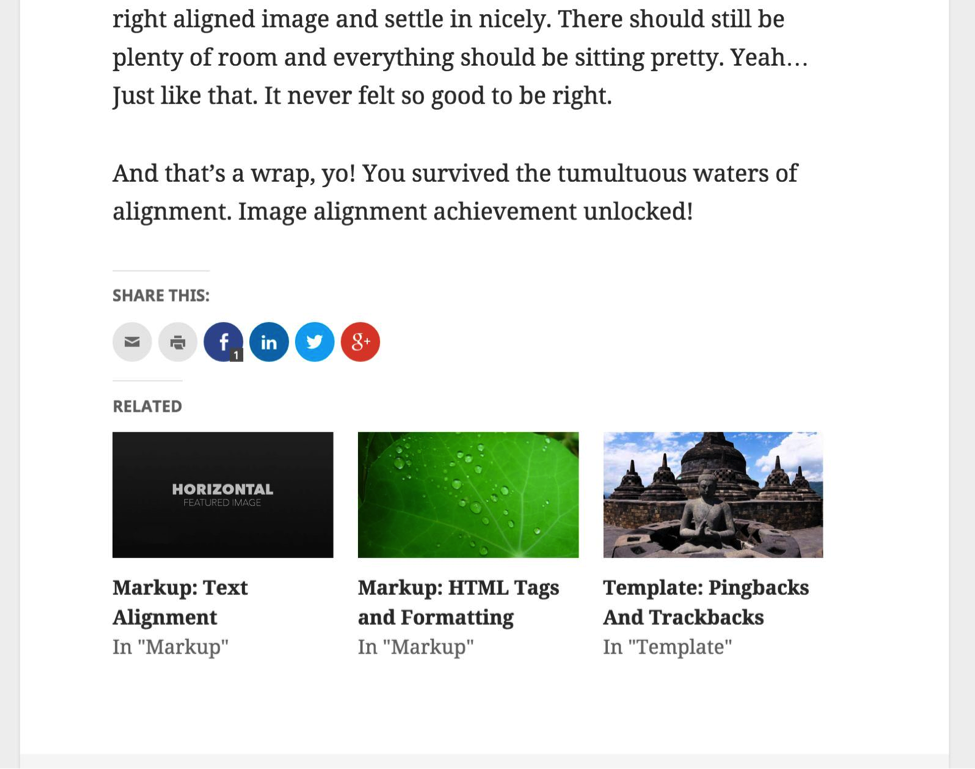
This is how it looks by default:
And with the two changes above:
Change Thumbnail Size
If you’d like to change the dimensions of the thumbnails that go with each related post, you can use the following. In this example, I’m making the images square, i.e. 125 x125:
function wtwlb_jp_image_size ( $thumbnail_size ) {
$thumbnail_size[‘width’] = 125;
$thumbnail_size[‘height’] = 125;
return $thumbnail_size;
}
add_filter( ‘jetpack_relatedposts_filter_thumbnail_size’, ‘wtwlb_jp_image_size’ );
You can find a slew of other tweaks like this here: http://jetpack.me/support/related-posts/customize-related-posts/
Customize The Mobile Theme
The mobile theme included in Jetpack is clean and functional, but, again, a little short on options. It’s not going to look like your desktop theme right out of the box, but it can be styled quite easily.
Create Custom Mobile Styles
There are a couple options to apply styling to the mobile theme. Remember, because it’s a separate theme, you cannot add your styling to your regular desktop theme style.css because that’s not going to be loaded on mobile.
- For an easy way to include custom CSS, I like to use a plugin called Simple Custom CSS. It just provides a box for you to enter your CSS and have it apply regardless of the theme. It’s perfect for these sort of cases. To target styles specifically within the mobile theme, just make sure to use the class: .mobile-theme
- Create a separate style sheet and enqueue it. This could be particularly useful if you want to keep your custom CSS out of the dashboard where an over-zealous client might get their hands on it.
Here’s the code you’d need to do that:
// Check if we are on mobile
function jetpackme_is_mobile() {
// Are Jetpack Mobile functions available?
if ( ! function_exists( ‘jetpack_is_mobile’ ) )
return false;
// Is Mobile theme showing?
if ( isset( $_COOKIE[‘akm_mobile’] ) && $_COOKIE[‘akm_mobile’] == ‘false’ )
return false;
return jetpack_is_mobile();
}
// On mobile? Enqueue your custom style sheet
if ( jetpackme_is_mobile() ) {
add_action( ‘wp_enqueue_scripts’, ‘wtwlb_jetpackme_mobile_css’ );
}
// Build the function
function wtwlb_jetpackme_mobile_css() {
wp_enqueue_style( ‘mobile-style’, plugins_url( ‘mobile-style.css’, FILE ), array(‘style’), ‘1’, ‘all’ );
}
In this case, I have created a mobile specific style sheet called mobile-style.css, which will be saved in the same folder as my functionality plugin.
Mobile Specific Widgets
Presently, there isn’t an elegant way to have mobile-specific widgets using the Jetpack mobile theme. But here’s a method that will work.
By default, the mobile theme will look in your main theme for a sidebar registered with the ID: sidebar-1 and it will use that at the bottom of your mobile theme. If your theme does not have a sidebar with that ID, you won’t have any widgets unless you register one for this purpose.
Assuming you do have that sidebar, by default all widgets in it will show on mobile. But if you want to control that and only show certain ones on mobile, you can use a plugin called Widget Logic. It gives you a field on each widget to specify conditions on which to show it. Here you can tap into a cool Jetpack function to designate the widget to show up only on mobile. On the widgets you want to show on mobile devices, enter:
jetpack_is_mobile()
For those widgets you only want on desktop, enter:
!jetpack_is_mobile()

Further reading:
A partial list of hooks in Jetpack
Official Jetpack documentation
Jetpack developers’ page
Customizing the mobile theme
Hopefully, this will entice you to dig deeper into the capabilities of Jetpack. Have you done something cool with Jetpack? Share it in the comments!